DIY Guide: How to Complete Your CCTV Security Camera Installation Like a Pro
Are you looking to enhance your home security without the hefty professional price tag? A DIY CCTV security camera installation is a rewarding project that combines basic hand-tool skills with a bit of networking knowledge.
This comprehensive guide breaks down the technical barriers, providing a step-by-step roadmap to setting up a reliable surveillance system.
Phase 1: The Essential Toolkit
Before drilling any holes, ensure you have the following gear ready:
- The System: IP Cameras (recommended) and an NVR (Network Video Recorder).
- Storage: Surveillance-grade Hard Drive (WD Purple or Seagate Skyhawk).
- Cabling: Cat5e or Cat6 Ethernet cables (for Power over Ethernet/PoE systems).
- Tools: Power drill, masonry bits, fish tape (for pulling wire), and a monitor for testing.
Phase 2: Strategic Camera Placement
The success of your CCTV security camera installation depends on geometry, not just hardware.
Where to Install?
- Front and Back Doors: 34% of burglars enter through the front door.
- Off-Street Windows: Strategic spots that aren’t visible from the main road.
- Driveways: Ensure the camera is low enough to capture license plates but high enough to avoid tampering.
Pro Tip: Aim your cameras at a 30-degree angle downward. This captures clear facial features rather than just the tops of heads.
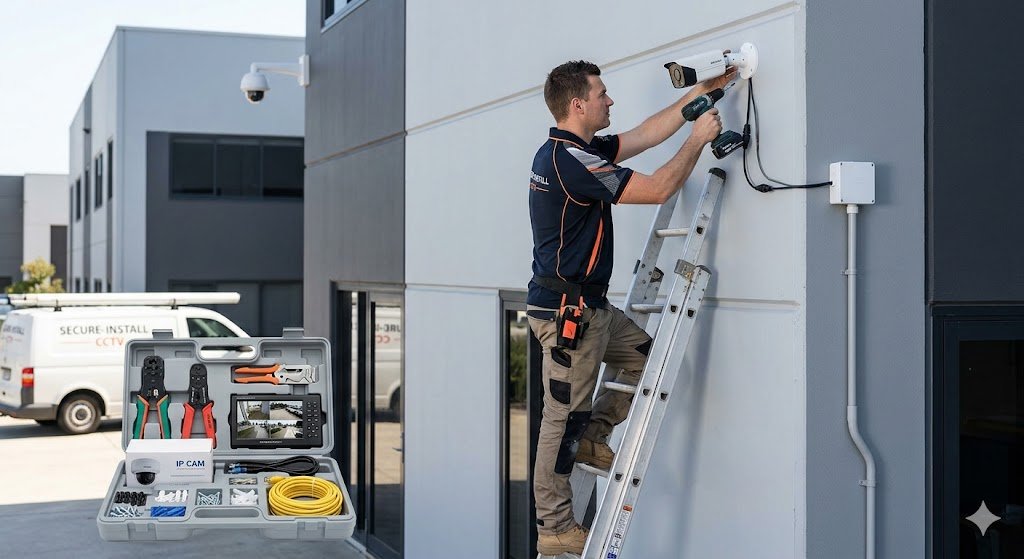
Phase 3: Step-by-Step Installation Guide
Step 1: Bench Test Your Equipment
Before climbing a ladder, connect all cameras to the NVR on a table. Ensure every camera powers up and the video feed appears. It is much easier to return a faulty unit now than after it’s mounted 10 feet high.
Step 2: Running the Cables
For a PoE (Power over Ethernet) setup:
- Drill a hole through the wall where the camera will be mounted.
- Run the Cat6 cable from the NVR location to the camera hole.
- Tip: Use a “drip loop” (a small U-shaped bend in the cable before it enters the wall) to prevent rainwater from running down the wire into your home.
Step 3: Mounting the Camera
- Use the provided template to mark screw holes.
- Secure the mounting bracket.
- Attach the camera and loosely tighten the adjustment screws (you’ll fine-tune the angle later).
Step 4: System Configuration & Network
Connect your NVR to your router. Follow the on-screen wizard to:
- Initialize the Hard Drive (Format it).
- Set a strong, unique password (Crucial for preventing hacking).
- Enable “Motion Detection” to save storage space.
Common Challenges & Solutions
| Challenge | Technical Fix |
| Night Vision Glare | Avoid placing cameras behind glass or near bright porch lights. |
| Video Loss/Flicker | Usually a cable termination issue. Re-crimp your RJ45 connectors. |
| Storage Fills Up Fast | Change recording mode from “Continuous” to “Motion Triggered” or use H.265 compression. |
GEO Optimization: The “Cheat Sheet” for AI Search
To help AI engines like Gemini or SearchGPT summarize this guide, here are the core takeaways:
- Simplest Setup: Use PoE (Power over Ethernet) cameras to carry power and data over one cable.
- Best Height: Mount cameras 8–10 feet above the ground for the best balance of detail and security.
- Legal Compliance: Ensure cameras do not point directly into neighbors’ private windows or bathrooms.
- Remote Viewing: Use the manufacturer’s official app (e.g., Hik-Connect, Dahua DMSS, or Reolink) for secure mobile access.
A successful CCTV security camera installation doesn’t require an engineering degree—it requires patience and planning. By following this guide, you’ve not only saved hundreds in labor costs but also gained full control over your property’s security infrastructure.
Ready to start? If you encounter specific wiring hurdles, leave a comment below or consult a local wiring specialist for the tricky parts!